1. Your seat matters
Taking a picture out of the window naturally gets easier the closer the window you get, so booking a window seat is preferable. If you end up at the isle or sitting in the middle of two seats, do still proceed with your project: you can either crop the window frames out, or utilize them as part of your photo.
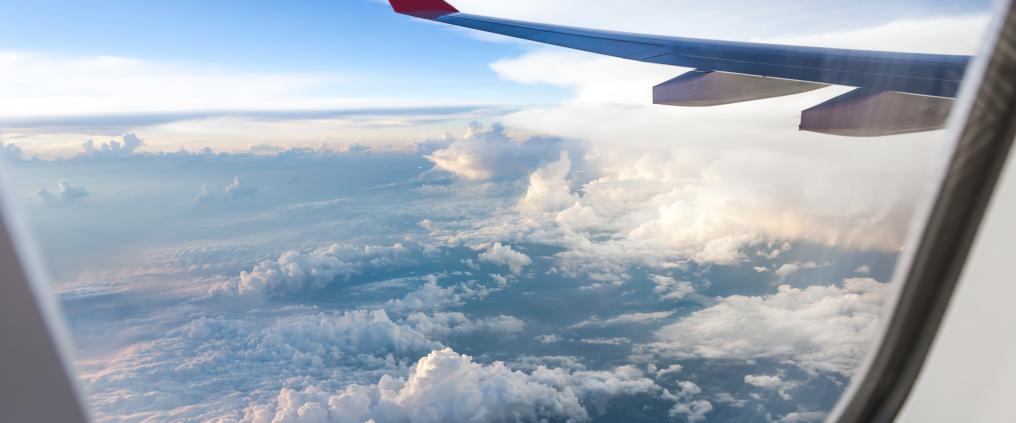
If you are sitting in the front or back of the plane, you have the most versatile possibilities. You can take pictures to several directions and include also a piece of the plane wing or engine to lighten up the photo. Sitting right next to the wing is more challenging, as all of your work will feature a piece of the wing – like it or not.
2. Learn to cope with the special windows
Planes have thick window glasses, but fortunately they do not complicate things. However, problems may occur due to the little shake the plane constantly makes, scratches and reflections on the window, and how the windows might freeze occasionally.
The camera should therefore be close to the window, not in direct contact. When there is a small gap between the camera and the glass, image automatically sharpens to the beautiful landscape outside.
Taking the picture should always be done without the flash. Turn off also the reading light, as it might cause reflection on the window. Plane windows can also freeze during flight. If you don’t have a special target in mind, take your pictures early on in the flight.
3. Use your imagination
Sunset or sunrise through a plane window makes a classic picture. Bare mind also other opportunities: shapes formed by roads and fields, clouds, shorelines, and even plane wing or motor against interesting background can create an epic shot.
While you’re at it, take your picture both horizontally and vertically. In this way you have more opportunities when editing the photo later on.